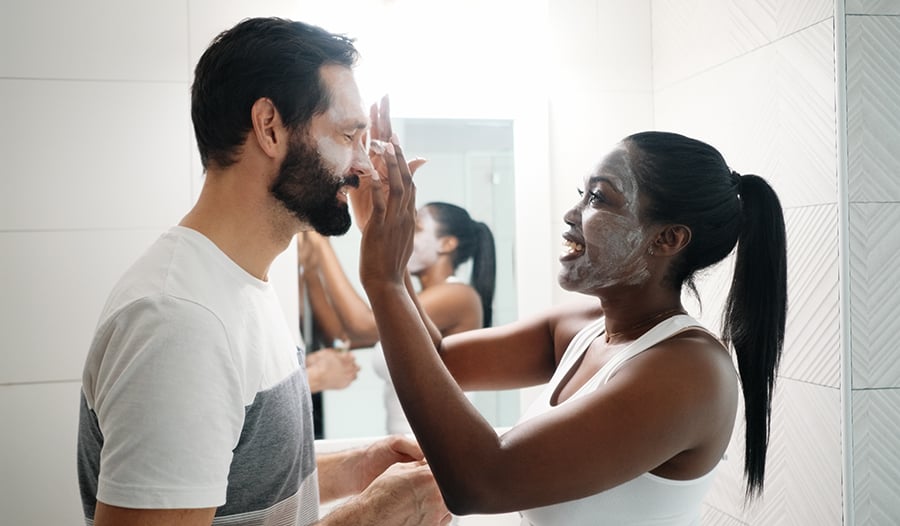
Let's face it, taking time for self-care can be difficult when life gets busy. But carving out a bit of time for self-pampering can do wonders for mental and physical well-being. By doing your beauty treatments at home, you can have a relaxing, rejuvenating experience without leaving the comfort of your own space. Not only that, but you can also save money by not going to salons or spas.
As a dermatologist, I am often asked about the best home beauty treatments. While some treatments are best left to the professionals, you can easily do plenty of beauty treatments at home. Though professional beauty treatments usually result in more noticeable effects, they are usually more expensive and require more downtime—especially if you get a procedure like a peel or laser. Doing your own beauty treatments at home not only saves you time and money, it also allows you to take control of your self-care routine.
Maintaining consistency in your routine is one of the most important ways to achieve healthy skin, nails, and hair. Frequently adding new beauty treatments or changing up your routine can lead to breakouts and irritation. So, if you’re considering doing home beauty treatments, try to stick with just a few and maintain consistency.
People with sensitive skin should be extra careful when doing home beauty treatments. Also, people with darker skin types should use caution to avoid treatments that could cause excessive irritation or inflammation, which can result in skin discoloration (hyperpigmentation).
In this blog post, I share some of my top recommendations for at-home beauty treatments, along with products that can help you achieve great results. Here are my recommendations for DIY beauty treatments that are both effective and safe.
1. DIY Hydrating Treatment
Ever heard of slugging? Slugging is a recently popularized skincare trend for moisturizing the skin. Even though it’s just hitting mainstream social media now, dermatologists have essentially been recommending “slugging” for years.
Slugging involves applying a layer of an occlusive ointment such as petroleum jelly (Vaseline), Aquaphor, or CeraVe Healing Ointment to the face at night. Slugging helps create a barrier that locks in moisture and prevents transepidermal water loss, resulting in smoother, more hydrated skin. This technique is especially popular during the winter months when skin is prone to dryness and dehydration.
However, slugging is not suitable for everyone. It can clog pores and lead to breakouts if it’s layered on too thick or if the face isn’t clean, especially in those with oily or acne-prone skin.
Slugging Hydration Treatment
- Step 1: Wash your face with a gentle cleanser.
- Step 2: Pat the skin dry with a clean towel, leaving it slightly damp—a bit of moisture on the skin is ideal.
- Step 3: With clean fingers, apply the ointment in a thin layer to the entire face. For even more hydration, apply a skincare product with hyaluronic acid or glycerin onto the skin after cleansing, before the ointment. Hyaluronic acid and glycerin act as humectants by drawing more moisture into the skin.
- Step 4: Leave on overnight, then rinse off with water or a gentle cleanser in the morning.
You can repeat the slugging at-home beauty treatment nightly as needed, depending on how dry your skin is. You could also do a similar process on the rest of your body if you have dry skin on your arms, legs, hands, or feet.
2. DIY Home Exfoliation
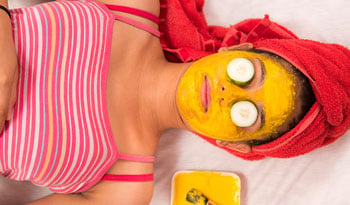
It seems like everyone is tempted to do home facial skincare treatments with household grocery items like lemons, oatmeal, avocado, or sugar. In general, putting food on your face is not a good idea. As a dermatologist, I recommend reserving your food for eating, not for skin care.
If you want to achieve a healthier, radiant glow without lasers or professional chemical peels, try doing regular exfoliating treatments one to three times a week. In the world of exfoliation, there are two ways to exfoliate: physical (mechanical) and chemical.
Physical Exfoliation
Physical exfoliation involves removing dead skin cells and debris from the skin's surface using abrasive tools, such as a scrub or a brush. Physical exfoliation is typically more intense and can cause irritation if not done correctly. Some examples of physical exfoliants include scrubs, loofahs, and cleansing brushes.
Chemical Exfoliation
Chemical exfoliation involves using chemicals, such as alpha-hydroxy acids (AHAs), beta-hydroxy acids (BHAs), or polyhydroxy acids (PHAs), to dissolve dead skin cells and unclog pores. Chemical exfoliation is gentler than physical exfoliation and is suitable for all skin types, including sensitive skin. Some examples of chemical exfoliants include glycolic acid, lactic acid, and salicylic acid.
In general, chemical exfoliation is the dermatologist-recommended route of exfoliation because physical exfoliation can cause irritation and inflammation, which can lead to breakouts.
3. DIY Hair Treatment
If your hair feels dry and damaged, a DIY hair treatment can help restore its health and shine. There are many popular oils out there for home hair treatments, including argan oil, castor oil, tea tree oil, and coconut oil.
- Coconut Oil: A recent review of studies found that coconut oil may be effective for improving brittle hair and minimizing hair breakage.
- Castor Oil: Evidence suggests castor oil may improve hair luster, but more research is needed to know for sure.
- Argan Oil: Currently, no evidence suggests that argan oil helps with hair quality or growth.
- Tea Tree: With its antimicrobial properties, tea tree may help minimize dandruff related to yeast overgrowth. However, tea tree oil can cause allergic and irritant contact dermatitis.
If you’d like to try a home hair treatment, I recommend doing a coconut oil treatment. Coconut oil is rich in fatty acids that can penetrate the hair shaft and nourish it from the inside out.
Coconut Oil Hair Treatment
- Step 1: Warm up the coconut oil. Make sure it’s not too hot, so you don’t burn yourself.
- Step 2: Apply the coconut oil to your hair and scalp. Massage in. Leave it on for at least 30 minutes or overnight for maximum benefits. If you’re leaving it on overnight, use a shower cap over your hair and cover your pillow, so it doesn’t get greasy.
- Step 3: Rinse thoroughly and follow up with a gentle shampoo and conditioner.
4. DIY Light Therapy
Light therapy is a popular treatment for acne and other skin conditions. It involves using different wavelengths of light to target specific concerns. You can perform light therapy at home with a device such as a LED mask or LED handheld device. Blue light effectively kills acne-causing bacteria, while red light can help reduce inflammation and promote collagen production.
Before using a light therapy device, read the instructions carefully and follow the recommended usage time. It's important to wear eye protection to avoid damage to the retina. Avoid using light therapy if you have a history of seizures or are taking certain medications.
5. DIY Home Pedicures
Pedicures are a great way to pamper your feet and keep them looking and feeling their best. You can also save a lot of money by doing your pedicures at home instead of at the nail salon.
Home Pampering Pedicure
- Step 1: Start by soaking your feet in warm water to soften your skin and relax your muscles. Add Epsom salt or essential oils to the water for an extra soothing effect.
- Step 2: Pat the skin dry. Apply a keratolytic moisturizing cream to feet and legs to tackle dry, thickened skin. Keratolytics help soften and break down the keratin protein in the skin's outer layer, making it easier to remove. Some examples of keratolytics include salicylic acid, urea, and ammonium lactate. These ingredients break down the intercellular bonds that hold dead skin cells together, which can help to smooth rough skin, unclog pores, and improve overall skin texture. You can also gently use a pumice stone or foot file to exfoliate any extra thick calluses.
- Step 3: Trim and shape your toenails. Try to avoid pushing back your cuticles with a cuticle pusher, as this can break the seal of protection the cuticle provides for the nail.
- Step 4: Apply a clear base coat of nail polish, followed by your favorite color of polish. Finish with a clear top coat. This makes the polish last longer and stay shiny.
Takeaway
Performing beauty treatments at home can be a great way to care for your skin, hair, and nails. However, it's important to be cautious and use high-quality products and devices. Remember to patch test any new products, follow the instructions carefully, and listen to your skin. If you experience any irritation or discomfort, stop using the product immediately and consult a dermatologist. By taking care of your skin and hair at home, you can feel confident and radiant every day.
Note: This blog is not intended to provide diagnosis, treatment, or medical advice. Content provided on this blog is for informational purposes only. Please consult with a physician or other healthcare professional regarding any medical or health-related diagnosis or treatment options. Information on this blog should not be considered a substitute for advice from a healthcare professional. The claims made about specific products throughout this blog are not approved to diagnose, treat, cure, or prevent disease.
References:
- Phong C, Lee V, Yale K, Sung C, Mesinkovska N. Coconut, Castor, and Argan Oil for Hair in Skin of Color Patients: A Systematic Review. J Drugs Dermatol. 2022;21(7):751-757.
- Kumari KMU, Yadav NP, Luqman S. Promising Essential Oils/Plant Extracts in the Prevention and Treatment of Dandruff Pathogenesis. Curr Top Med Chem. 2022;22(13):1104-1133.

 By Dr. Afton (Chavez) Cobb M.D., F.A.A.D.